Thursday, December 22, 2011

It's Tradition

My Grandma (dad's side) always makes Italian cookies during the winter holidays.  Every year all the grand kids would come to assist grandma in the making (and eating) of the various cookies.  My favorite ones to make is the Pizzelle.  A couple of years ago I bought my very own Pizzelle maker, and now I've been continuing the tradition at my home.  This year I wrapped them and gave them as hostess gifts.

 First I wrapped them in plastic wrap. I think next year I will use the shrink wrap.
Next I made a few 3 inch hole punches and stamped them with a Reindeer and Snowflake stamps.
Finally I wrapped the stack with a single ribbon and pasted the reindeer circular card on top.


I use this recipe, and you can find Pizzelle makers on this website.

Hope to continue this tradition for years to come...

hugs,
miss peanutbutter


photos edited with actions by Florabella Collection: Classic Workflow

Tuesday, December 20, 2011

More Baby Hats

I recently made 5 hats for my friend Kara, and they all turned out so adorable. I continued making more hats after I was finished with her order, and here are a few shots.


The Yellow earflap hat went to my pal Leigh Ann's little one, and the Violet one went to my pal Jinger's one (still in the oven so kitty is wearing it :) ).

Here are a few without the ear flaps. These haven't found homes yet... but I am sure they will.

I am currently making one more earflap hat in pink for 3 year old sister Sasha's baby dolls. Then I am making mittens for my 7 year old sister Sophie (pink), 5 year old brother Oliver (red), and a set for Sasha (pink). :)


hugs,
miss peanutbutter


photos edited with actions by Florabella Collection: Classic Workflow

Wednesday, November 23, 2011

Miragamo; finishing details


First, I cut a rectangular base of sturdy needle point plastic. This is then secured to the base of the bag.

Here is a picture of the plastic sewn into the base.


Next you cut a few strips of the needle point plastic to as reinforcement for the top of the bag. The knitted portion is folded over to hide the plastic. This gives a nice finished edge at the top of the bag.


Here I have sewn the strips together, and turned it inside out.
And here is what the top looks like after it is pinned in place.


I then sewed it down along the garter stitch, as stated in the pattern.
Next, I sewed the handles onto the bag. This I did twice, because I wasn't happy with the positioning. In the pattern, the author says, "neatness counts" and she is right. I used more of the plastic needle point to use as a backing while sewing the handles on. The fabric sat in between the handle and the plastic. Here is a picture.


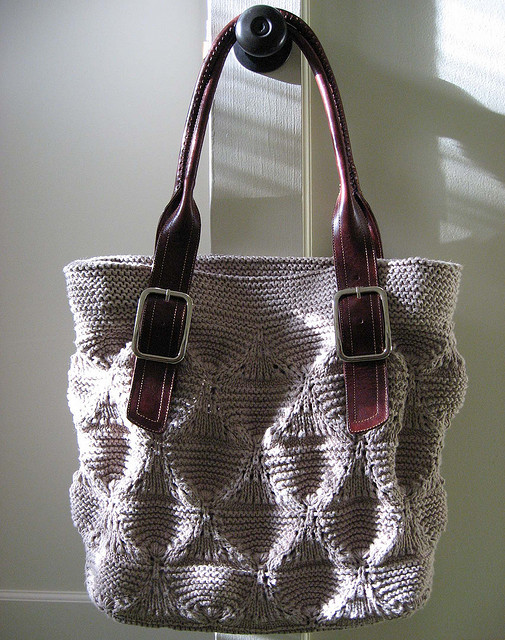
Here is the final picture of the handles attached to the completed bag.


I still need to sew inside the lining, but here is a picture of the fabric my grandma and I picked out while I was visiting for Thanksgiving.


hugs,
miss peanutbutter


photos edited with actions by Florabella Collection: Classic Workflow

Tuesday, November 22, 2011

Miragamo continued; knitting is finished

So the knitting is finally finished.  Here is what it looks like before the finishing details are completed.


hugs,
miss peanutbutter


photos edited with actions by Florabella Collection: Classic Workflow

Friday, November 11, 2011

Thursday, November 10, 2011

Miragamo, continued

So, I a have knitted through 4 hanks of yarn and here is what it looks like so far. I am double knitting (using 2 strands at once), so that is contributing to the consumption as well.


This is the picture from the pattern that I am following. I can't wait to finally have made something for myself. It will go great with my new boots that came today :)


hugs,
miss peanutbutter


photos edited with actions by Florabella Collection: Classic Workflow

Saturday, November 5, 2011

Miragamo, knitting

So, I started on the knitting late Oct, and when I got to row 30 something I realized that the whole thing was twisted! I must have not been paying attention when I joined my first round. The only way to fix this is to take it apart, and start over (yes, start over). I could have casted off and turned it into a mobious scarf, but since I am double knitting it would have been very heavy.
I took it apart and I am now around row 45. Here's what it looks like now. Like I said above, it is knitted on circular needles. I am using size 7, and it is 29 inches around. You can see all the various markers keeping count of all the increases and decreases :)

photos edited with actions by Florabella Collection: Classic Workflow